
Upgrading your PC to a Solid State Drive (SSD) requires identifying your motherboard’s compatible connection type (SATA or M.2), migrating your existing data using cloning software, physically installing the drive into the appropriate slot, and configuring your system’s BIOS and disk management settings to recognize the new hardware. This single hardware modification fundamentally changes how your computer operates. The days of tiny mechanical arms reading data off spinning metal plates are over. We now use microscopic grids of flash memory holding electrical charges to store entire operating systems.
The speed improvement is immediately obvious. Older mechanical hard disk drives manage a fraction of the data transfer rates seen in modern solid-state options. Today’s newer drives routinely hit transfer speeds of thousands of megabytes per second. The computer boots faster, applications launch instantly, and the entire operating system feels highly responsive.
This guide walks you through the exact steps to select, prepare, and install the right storage hardware for your specific machine.
Step-by-Step Instructions: Preparing for the Upgrade
You cannot just buy a drive and jam it into the computer. You need a plan for your data. You also need to confirm what kind of hardware fits inside your PC case. This initial phase prevents frustration and ensures your existing files transfer over safely.
Check Your Compatibility and Form Factor
There are two main types of internal solid state drives for personal computers. You must determine what your motherboard supports before purchasing anything.
- 2.5-inch SATA Drives: These resemble smaller traditional hard drives. They sit inside a metal or plastic enclosure and require two physical cables to function. Almost every desktop motherboard made in the last fifteen years supports SATA connections.
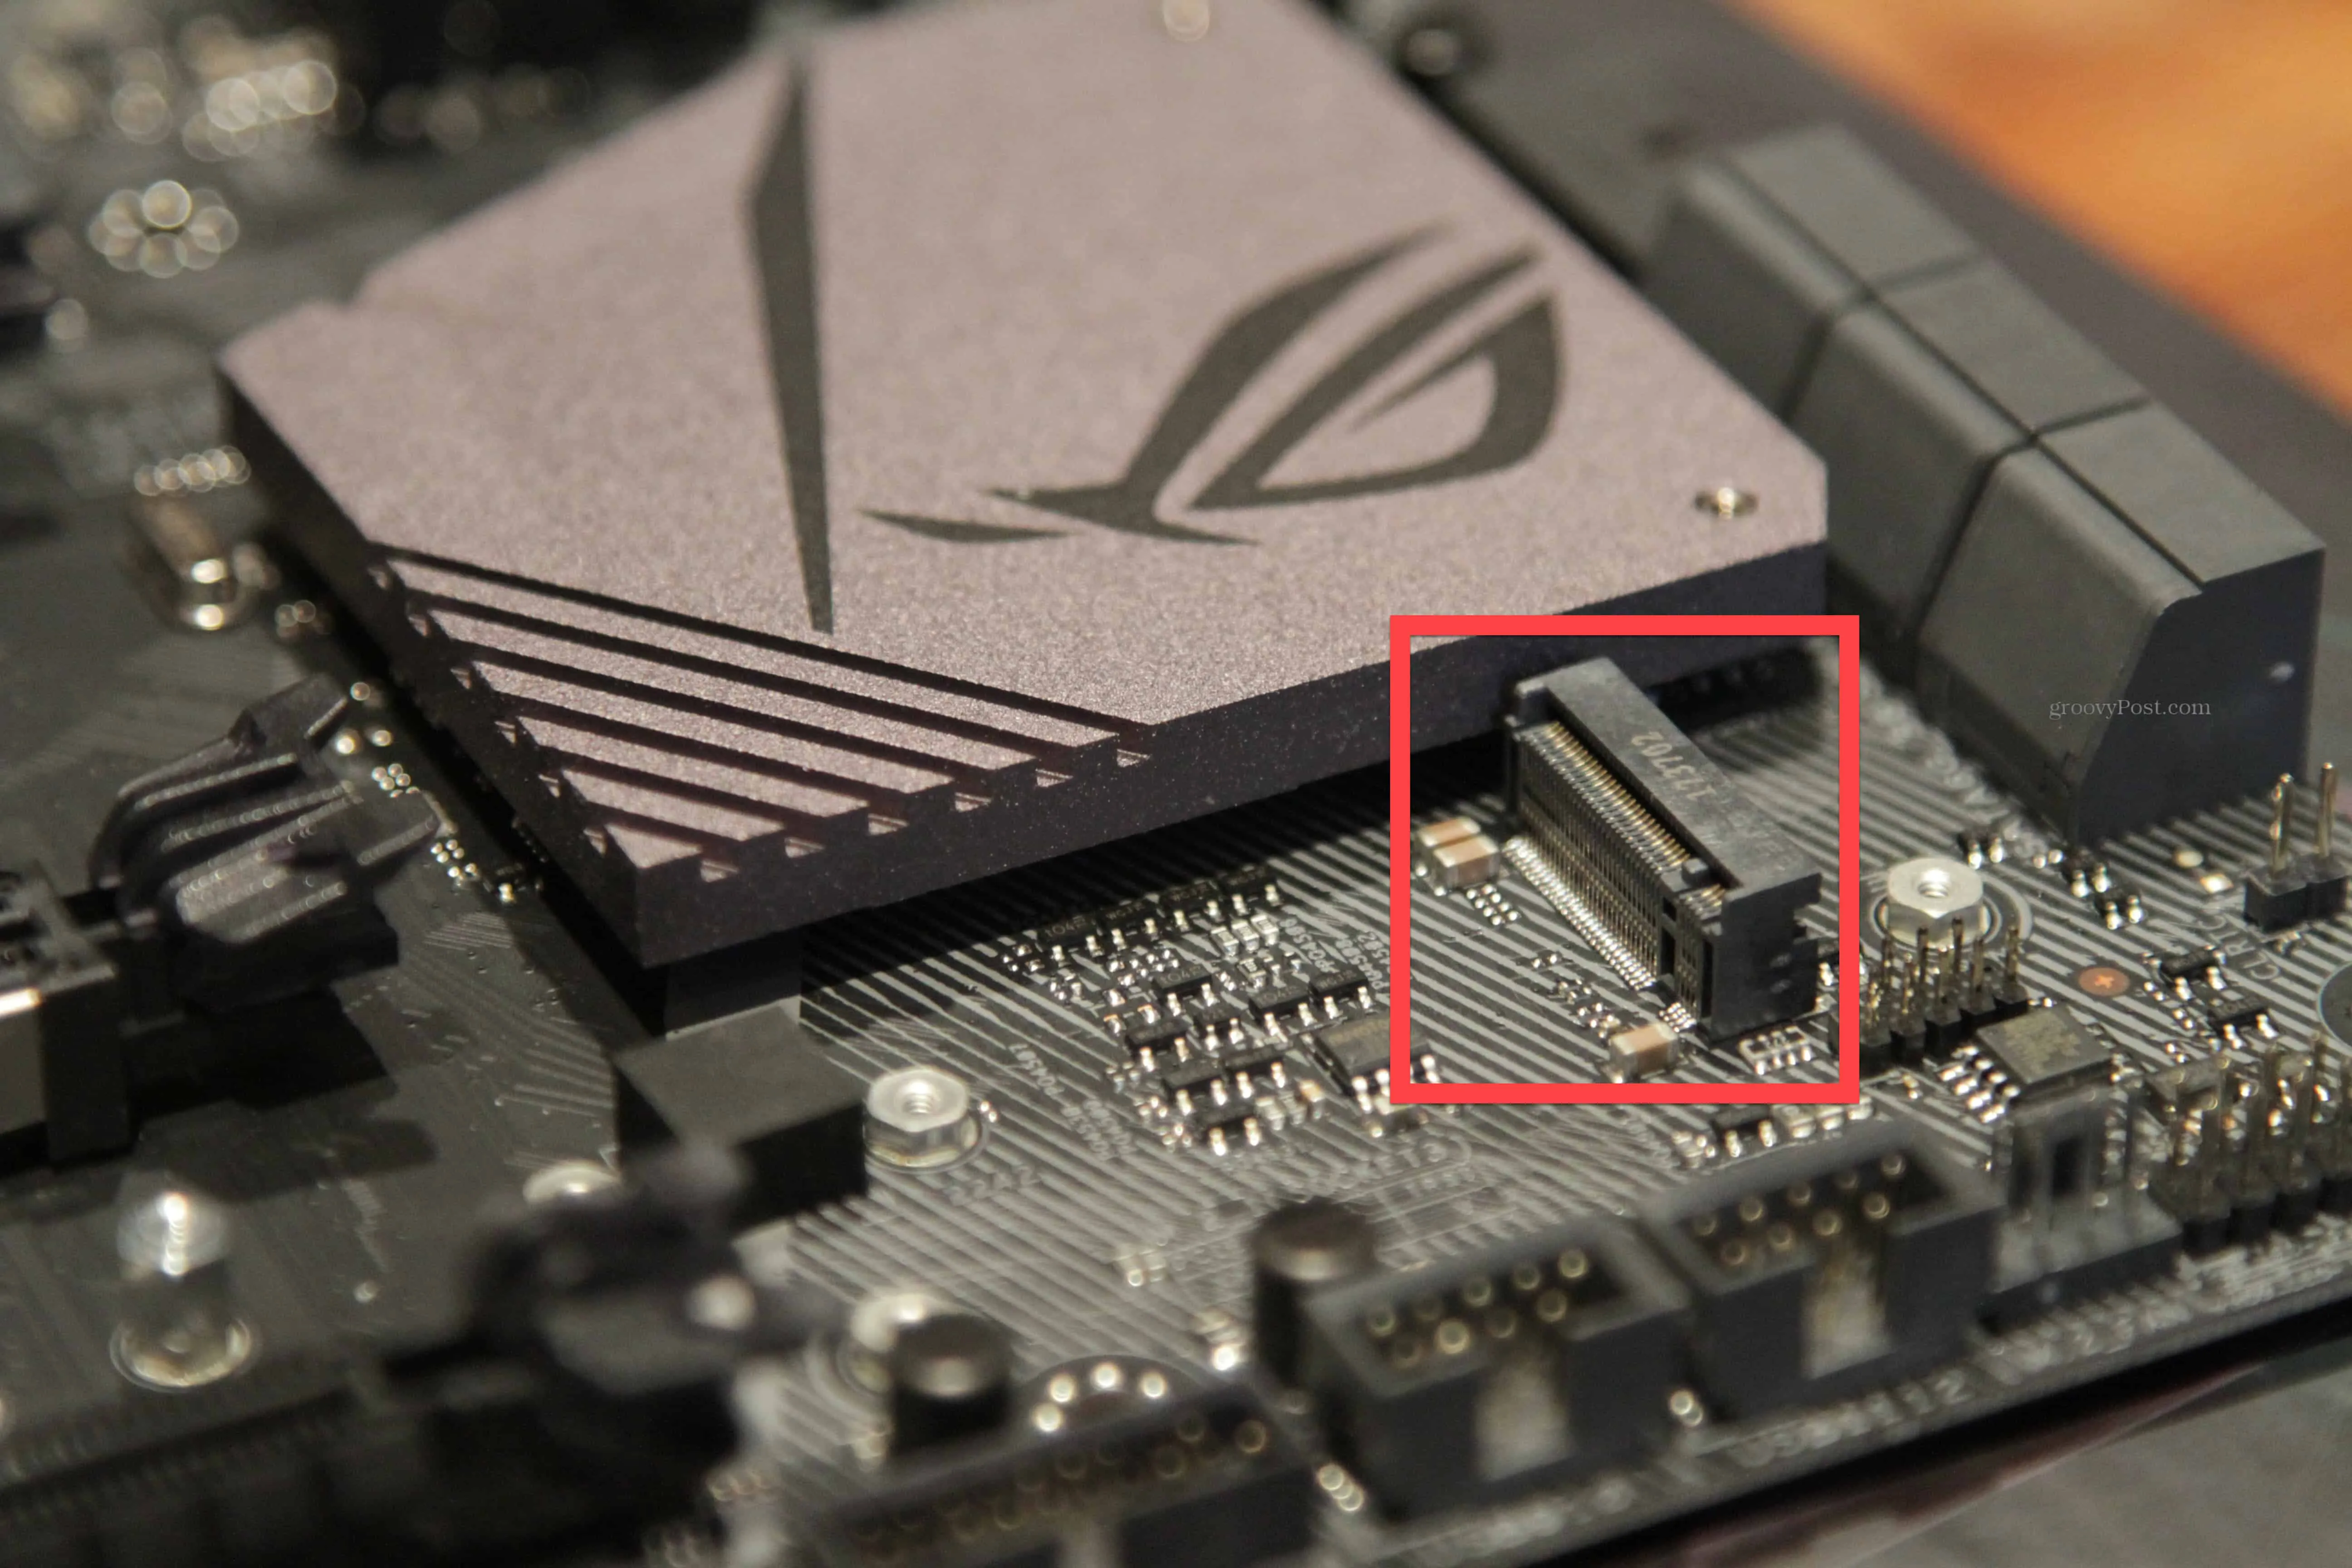
- M.2 NVMe Drives: These look like a small, flat piece of chewing gum. They plug directly into a dedicated slot on the motherboard itself. This format uses the newer NVMe protocol, bypassing the older SATA speed limits completely.
Consult your motherboard’s manual or use an online system scanner tool to find out if you have an open M.2 slot or if you need to stick with a standard 2.5-inch SATA drive.
Plan Your Data Migration Strategy
Most users want to keep their current operating system, software licenses, and personal files. You will need to move your existing data from the old drive to the new one. You need specific cloning software and potentially an external enclosure to handle this transfer.
If you are upgrading a laptop with only one drive bay, you install the new drive into a temporary USB enclosure. You connect it to your computer, run the cloning software, and let it copy every single byte of data. Once the clone finishes, you swap the physical drives. Desktop users with multiple internal bays can usually just plug both drives into the motherboard at the same time to perform the clone.
Safety and Workspace Preparation
Computer components are highly sensitive to static electricity. Always power down your PC entirely before touching any internal hardware. Unplug the main power cable from the wall outlet.
Press the power button on the front of the case a few times while it is unplugged. This drains any residual electrical charge left in the power supply capacitors. Work on a hard, non-carpeted surface to minimize static buildup.
Step-by-Step Instructions: The Physical Installation
The installation method changes depending on the form factor you purchased. Ensure you have a small Philips-head screwdriver ready. Modern computer cases often use tool-less designs, but you still need a screwdriver for tiny motherboard screws.
Installing a 2.5-inch SATA SSD
Open your computer case and locate the drive cage. This is usually a metal rack near the front of the case designed to hold hard drives. Some modern cases feature mounting brackets specifically designed for smaller 2.5-inch drives behind the motherboard tray.
- Mount the drive using screws or slide it into the tool-less caddy. Secure it firmly so it does not rattle around.
- Locate the L-shaped SATA data cable. Connect one end to the back of the new drive and the other end to an open SATA port on your motherboard.
- Find an available SATA power cable coming from your Power Supply Unit (PSU). This cable is wider than the data cable. Plug it into the remaining slot on the back of the drive.
Ensure both cables are fully seated. A loose connection here is the most common reason a new drive fails to show up when you turn the computer on.
Installing an M.2 NVMe SSD
This process is entirely different and requires no cables. The M.2 slot sits flat against the motherboard. It is often located just below the processor socket or situated between the PCIe slots.
- Locate the small standoff and tiny securing screw on the motherboard at the end of the M.2 slot. Remove the screw and keep it safe.
- Insert the connector end of the M.2 drive into the motherboard slot. It will naturally sit at a slight upward angle.
- Gently push the raised end of the drive down flat against the standoff.
- Re-insert the tiny screw to hold the drive flat in place. Do not over-tighten it.
Some motherboards feature integrated metal heatsinks over their M.2 slots. You must unscrew and remove the heatsink to access the slot underneath. Remember to peel the protective plastic film off the heatsink’s thermal pad before screwing it back over the new drive.
Post-Installation Setup and Optimization
The physical installation is just the hardware phase. You now need to tell your computer’s software how to communicate with the new component. If you cloned your old drive perfectly, the computer might boot right up. More often, you need to configure a few basic settings.
Drive Initialization in Windows
If you installed the new hardware as a secondary storage drive, Windows will not recognize it in the File Explorer automatically. You must format the raw flash memory first. Open the Windows start menu and search for ‘Disk Management’.
The Disk Management utility will usually pop up a window asking you to initialize the unknown hardware. You must right-click the unallocated space and choose the initialization setting to bring the drive online. Modern systems use the GUID Partition Table (GPT) format for this step. Once initialized, right-click the unallocated space again to assign it a drive letter and format it as NTFS.
Configuring the BIOS Boot Order
If you cloned your operating system to the new drive, the computer might still try to boot from the old, slower drive. You need to interrupt the startup process and enter the motherboard’s basic input/output system (BIOS) or UEFI interface. You usually do this by mashing the Delete or F2 key the moment you turn the machine on.
Navigate to the boot priority menus. You must ensure the new hardware is listed as the primary boot option at the very top of the list. Save your changes and exit. The computer will now load the operating system straight from the fast flash memory.
Firmware and TRIM Optimization
Manufacturers regularly release firmware updates to improve hardware stability and speed. Download the official dashboard application from the company that made your drive. Use this tool to check for required firmware patches.
You also need to verify that a feature called TRIM is running. TRIM is a command the operating system uses to tell the hardware which data blocks are no longer considered in use and can be wiped internally. This keeps the flash memory running at top speed over years of constant use. Windows usually enables TRIM by default when it detects flash storage, but checking the dashboard application confirms it.
Common Issues and Fixes
Hardware upgrades rarely go perfectly the first time. Sometimes a simple oversight causes the computer to reject the new hardware. Let us look at the most frequent roadblocks.
The Drive Is Not Detected in the BIOS: This almost always points to a physical connection issue. Open the case back up. Push the SATA power and data cables firmly into their sockets. If you are using an M.2 drive, remove the tiny screw, pull the drive out, and re-seat it firmly into the slot. Sometimes an older motherboard requires a BIOS software update before it understands how to talk to a newer NVMe drive.
Cloning Software Errors: Cloning fails if the destination drive is smaller than the amount of data on the source drive. You must delete large media files or uninstall huge video games from your old hard drive until your used space falls below the maximum capacity of your new purchase.
Performance Degrades Over Time: If the drive slows down after six months of use, you likely skipped the TRIM optimization step. Open your manufacturer’s dashboard and turn TRIM on. Also, flash memory slows down drastically when it gets completely full. Always leave at least ten to fifteen percent of the drive entirely empty to give the storage controller room to shuffle data around.
The Tangible Impact on Performance
Replacing mechanical storage with flash memory changes the entire computing experience. The numbers back up the feeling of instant responsiveness. Tech industry testing shows file opening speeds are noticeably quicker, often shaving off a third of the standard wait time compared to mechanical hardware. The lack of spinning platters and moving read/write heads means these drives are completely silent.
They are also incredibly durable. Because they lack fragile moving parts, they are highly resilient to physical shocks and accidental drops. This makes them ideal for portable laptops. The energy efficiency is also vastly superior. Testing confirms traditional hard drives draw roughly half again as much power as solid state options. This lower power draw extends laptop battery life and reduces overall electricity consumption in larger desktop setups.
The benefits scale up massively for professional servers. In high-demand environments requiring hundreds of thousands of input/output operations per second, enterprise data shows solid state options can reduce the cost per I/O by over ninety percent while drastically cutting down on physical rack space and cooling requirements. Historical industry studies point to this technology delivering up to sixty times better performance relative to its cost compared to older mechanical arrays.
Frequently Asked Questions
Do I need cables to install an M.2 SSD?
No. An M.2 NVMe SSD plugs directly into a dedicated, specifically shaped slot on the motherboard itself. You secure it against the board with a single small screw. It draws all its electrical power and transfers all its data through that slot connection, completely eliminating the need for separate SATA data or power cables inside the computer case.
Why isn’t my new SSD showing up in Windows?
A brand new drive straight from the factory is completely blank and unformatted. Windows cannot see it in the standard file explorer until it is prepared for use. You must open the Disk Management utility, initialize the disk, choose a partition style like GPT for modern systems, and then format it with a drive letter. Once formatted, it appears as a usable volume.
Can I use an SSD and an HDD at the same time?
Yes. This is a very common and cost-effective computer building strategy. Many users install a smaller, very fast solid state drive to hold their operating system and their most frequently used applications. They keep a larger, cheaper traditional hard disk drive connected via SATA cables purely for mass storage of heavy media files, documents, and backups.